All posts by jessica

Diffusing fragrances: 4 simple household essential oil diffusers

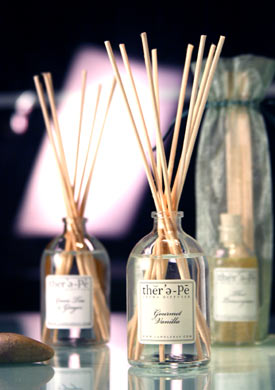
Diffusing essential oils involves dispersing oils into a room or an area so that the aroma of the oils fill the room/area and is sufficient enough to be inhaled by people. Diffusing oils can be therapeutic and aromatic at the same time, thanks to the pleasant scent of oils or blends diffused. Some people tend to think that diffusing oils requires a lot of work, including purchase of expensive diffusers. Not really. There are methods using which you can diffuse oils with diffusers made of household things. If you are not satisfied with the kind of diffusers you use, you can probably try diffusers that are inexpensive and readily available in stores. This article will elaborate on how to use household things or cheap stuff as diffusers and reap the benefit of using a great diffuser from them.


Diffusing essential oils – Methods: There are several methods to disperse essential oils. Below are a few of them:

1. Simple Tissue Diffusion method: This method involves use of nothing but a tissue. You can use the tissue to diffuse oils instantly and get immediate benefit out of it. Take out a tissue and pour 3 to 4 drops of essential oils or essential oil blends on it. You may not be able to get the full aroma when the tissue is close by. But, when you move across the room, you will scent the fragrance of your blend. Though this diffusion is the easiest, simplest and most immediate, it cannot spread the aroma into an entire room. But this method can be used anywhere and is easily transportable.

2. Steam Diffusion method: A very common method. You can diffuse essential oils by using steam. That is, heat water and pour it into a bowl. Add about 10 drops of oil to the hot water. The heat will diffuse the oils and spread the aroma. Use lesser number of drops in case of oils which may cause irritation to your mucous membrane. Some of such oils include Cinnamon, Eucalyptus, Rosemary, Pine, Thyme, Cajuput etc. Relaxing oils diffuse well and make you feel fulfilled and happy. One of the defects of this method is, the aroma does not stay longer. Also, heat can alter the therapeutic effects of oils, unlike in other diffusers.

3. Candle Diffusion method: This is also a common method. You can try this at your home and anywhere you can burn a candle. Light a candle and allow it to burn for a few minutes. Once the candle starts melting, extinguish the light and pour a drop or two of essential oil on to the melted wax (near the wick) of the candle. See to it that your oil does not fall on the wick. Now, light the candle again and enjoy the aroma. The heat of wax and light of the candle will spread the aroma of the oil blend. Though this method is useful, it is not long-lasting and may cause serious danger on account of the high inflammability of essential oils.

4. Clay Pot diffusion method:
This method can be followed if you have a clay pot diffuser made of terra coat. A small pot can be used if you cannot buy a commercial Clay Pot diffuser. Take a small pot and pour essential oil blends in to it. Close the pot with a cork, with just a single opening (of the size of a small hole). The aroma depends on the size of the hole and the quantity of oils in the pot. The aroma is the strongest shortly after you pour oils, but dissipates after time passes.

Cuticle care: Natural essential oil brush-on recipe for cuticles

Skin care should be on top of our agenda during winter time. It is not just the season but also our slackness in personal care that results in increased number of skin problems during winter. Nails need constant care specially and even if your nail is strong and fast-growing, you may need to manicure them carefully to maintain their shape and appeal. Cuticle care comes in only here.

Most of us ignore our cuticles and fail to attend to them. They grow long, making the skin around look ugly, unwanted and rough. In such a condition, use of cuticle balms are a must. Handmade cuticle balms are available in small jars/bottles commercially. Though these are good in their job of cuticle cleaning, these kinds of balms are often synthetic, made of caustic chemicals. There is an alternative to this and that is an essential oil blend for cuticle care. This article will elaborate on how to make a cuticle care blend for improving your cuticles.


Aromatherapy oils for cuticles: A clean and manicured cuticle looks better than an ugly, untamed one. To get better cuticles, you need not waste money on commercial brands or local balms. Instead, you can use your own recipe of essential oils. Your recipe will be all-natural and synthetics-free. The paste that you make will also yield an aroma that would rejuvenate you in many ways. You can brush-on this recipe on to your cuticle using a simple nail polish brush. You can use nail polish bottles (empty, new ones) to apply oils on a daily basis. Packaging can also be done in small roll-on bottles with dropper tops too.

Cuticle Oil Recipe: Cleaning your cuticles and manicuring them can be a difficult thing if you do not have the right kind of cream/oil. This cuticle essential oil recipe can help you cleanse and properly maintain your cuticles. To prepare the recipe, you will need the following supplies: ½ fl ounce cold pressed carrier/vegetable oil, 5-8 drops of essential oil and a nail polish bottle. When you plan to choose your cold pressed oil, select only oils that are rich in EFAs. Cranberry seed oil might be a great option. But any cold pressed oil might work. For essential oils, you can use oils that are soft and soothing on skin. Lavender, Tea Tree, Patchouli and Sandalwood may work well. With regard to nail polish bottles, get new or completely cleaned empty nail polish bottles.

Add the carrier oil to the nail polish bottle and add essential oils after it. Close the bottle and shake it vigorously. When the oils are blended well, use the nail polish brush to apply the cuticle recipe on to the skin surrounding your nails. Massage the oil well at least once a day. Discard any remaining cuticle oil every two weeks and prepare a new batch of oils if needed for further use.

Qualified vs quack: 7 ways to identify a professional aromatherapist

Finding a good aromatherapist is often more difficult than finding a good doctor. In the United States. Almost anyone can call themselves an aromatherapist as there is no standardization or Federal certification for aromatherapy or the alternative medicine that uses essential oils. This leads to a number of courses that offer certification on aromatherapy, the art of blending essential oils and so on. Confusion sets in, when your aromatherapy practitioner says he is an aromatherapist and not an aromatologist. There are subtle differences between aromatherapist, aromatologist, aromacologist and aromatherapy practitioner etc. This article will detail on how to identify the differences and find the right aromatherapist for yourself.

How to find qualified from quack? Qualified. You need to find one who has experience, qualification and sound knowledge in essential oils and aromatherapy. Any quack can boast himself as an aromatherapist and loot money from you if you are not shrewd enough to put him to rigorous questioning. Yes, before relating to a qualified aromatherapist, you need to put him to test and ask him about his details – aromatherapy study, experience as practitioner and successful cases handled.


If you live in the U.S., you need to find out what is your State’s stand on aromatherapy eduction and how it licenses/does not license aromatherapists.  If you are in other countries, find out the Federal rule of your country and identify aromatherapists based on your State’s certification principles. It should be brought to light that there is no Fed-recognized certification for aromatherapists right now. There are only two kinds of aromatherapy practitioners – aromatherapists and aromatologists. An aromatherapist is an individual who has formal training in aromatherapy and has hands-on experience in the field of massage, nursing or cosmetology. An aromatologist is an individual who has formal training in the subject, but is not experienced in nursing or massaging or other related study. What is generally offered by aromatherapy institutions is a certificate or diploma in the subject and hence, you need to know the details of the course only from an aromatherapist before you undergo your therapy with him.

How to find an aromatherapist: There are several ways and below are a few of them:

1. Check your Yellow Pages: Best and easiest way out. You need to check your local Yellow Pages and find aromatherapists in Aromatherapy or Alternative Medicine columns. You can call the person to verify his credentials.

2. Ask local massage therapists: If you know of any massage therapist, you can ask them of aromatherapists they know. They would definitely be in touch with some renowned ones and so you can find the qualified from the quack.

3. Go online or on the spot: Check online or go to the spot of alternative medicine centers. You will definitely get a few leads to good aromatherapy practitioners.

4. Ask for details: Once you find a list of aromatherapists, you need to verify their credentials. You can do this by asking them about their formal training – Where and how long did you train yourself in aromatherapy? Do you have any certification for the same? This can be an appropriate question.

5. Certificate is not license: Having a certificate from a University is different from being licensed from the State. So, ask for that too.

6. Ask for hands-on experience:
Distinguish whether the person is an aromatherapist or aromatologist. Find out the experience the aromatherapist has in massaging, nursing or other related study. This would help you find the authenticity of the person.

7. Observe the attitude:
This is important. How does the individual feel when you ask all these question? Good, bad or terse or stressed? Or, does the person avoid such questions? This will help you know the true self of the practitioner.

Hit the books: 5 popular books on aromatherapy you can read

Apart from the web and viral information, books are the true source of knowledge when it comes to aromatherapy. If you are a Do It Yourselfer, you cannot practice aromatherapy without books. This article will throw light on several popular books in the field of aromatherapy. Most of these books are written by famous aromatherapists, doctors or alternative medicine advocates who have years of experience in the world of aromatherapy and essential oils.

Popular books on aromatherapy: There are several books on aromatherapy and most of them are written by exceptional practitioners of the field. A few of them are patients who have come forward to write books based on the specific aromatherapy that cured them from a major illness or disease. Before we start to examine the books in the field, let me tell you why you should read aromatherapy books –


1. They are a true source of knowledge, as they are accepted by the society.
2. Some of the current aromatherapists may follow the rules of the book word for word. So, if you know the rules beforehand, you can tell your therapist what you want and do not want.
3. You will know what is true aromatherapy from the fake fragrance oil practices
4. You will gain deep knowledge in the field so much so that even if you don’t become an aromatherapist, you will be able to recommend it to friends and family
5. Books offer you a lot of recipes for aromatherapy blends. And the best part is, you can do all these from the comfort of your home

Below is a list of popular books in the science of this alternative medicine called aromatherapy. This is just an extract from what is available. To know the complete list of books, regularly read book reviews or search online.

1. The Complete Book of Essential Oils & Aromatherapy by Valerie Ann Worwood. A beginner’s must-have book. If you know a bit about aromatherapy and are confused where to start, this is the book to read. It gives you an introduction to essential oils, a chapter on various essential oils and over 600 recipes/synergies. You can read this book to know all about the science and also practice it at the convenience of your home.

2. The Illustrated Encyclopedia of Essential Oils by Julia Lawless. The best book for aromatherapy students, however, it will be useful to beginners even. The book gives an outstanding reference to over 160 essential oils and that means oils for particular remedies like skin problems, pain, common ailments, major diseases etc. The book features an introduction to aromatics, a therapeutic index consisting of essential oils and a section that has monographs of about 165 oils.

3. Advanced Aromatherapy by Kurt Schnaubelt. A 138-page book that is of the size of a textbook and features all and sundry information about the advanced stage of aromatherapy. It talks about Essential oil chemistry, Essential oil profile nuances, selection process and application of particular blends etc.

4. 500 Formulas for Aromatherapy by Carol Schiller & David Schiller. This is a book of recipes. If you know what is aromatherapy and what it can do to you, then, this is the book to look for. This book gives 500 formulas on aromatherapy blends that you may never or know otherwise. A compilation as this is very useful to one who is practicing aromatherapy.

5. Holistic Aromatherapy for Animals: A Comprehensive Guide to the Use of Essential Oils and Hydrosols with Animals by Kristen Leigh Bell. This book gives information on both aromatherapy, EO profiles and also on how to use aromatherapy for animals. It details on how to apply aromatherapy for dogs, cats, horses and other pet animals and the dos and don’ts of the therapy.

Aromatherapy for beginners: 8 do’s and don’ts for a novice aromatherapist

The general misconception about aromatherapy is, people think it to be a complete alternative to traditional medicine and imagine that essential oils can cure everything from cancer to diabetes without the intake of oral drugs. This is wrong. Aromatherapy is just a complementary system of medicine and cannot or should not be used as the only kind of medicine. It can be added to the holistic way of healing you practice as it can alleviate your regular disease-symptoms and give you instant relief. However, that does not mean that essential oils can treat the disease in question.

Aromatherapy for beginners – Tips: Aromatherapy can be a difficult path for beginners if they go into it with preconceived myths or notions.  Many who are new to essential oil usage, do not know what is to done and what is not to be done with regard to oils, their blending or usage properties.


Essential oils – Do’s and Don’ts: Below is a quick reference of how to and how not to use essential oils:

1. Read as much as possible about aromatherapy and the usage of essential oils. Knowing about it can save you time, money and waste of oils. You will get to know how to cure symptoms of serious ailments, common disorders and chronic diseases. Once you start applying aromatherapy principles, you will start feeling happy, relaxed and at home with yourself. You need to know about the various blends, properties of pure essential oils, carrier oils, grain alcohol, CO2s, absolutes etc.

2. Check for the purity of the essential oils you buy. Many companies promise pure quality essential oils when they know pretty well that they sell nothing but bad stuff. Beware of false claims by learning to identify purity through indicators – check for the plant’s Latin name, origin (place, country, growth conditions), extraction and distillation processes etc. with your buyer. If your buyer knows the properties of oils and can differentiate between a true and fake oil, chances are, he is well-acquainted with this aromatherapy business and can guide you in buying oils.

3. Start small. Do not end up making large quantity blends at the beginning. Even if you feel you are an expert in blending essential oils, avoid making blends in large quantities. Sometimes it can be a waste of time, money and effort. Start using oils in 5, 10, 20 drops.

4. Compare prices before you buy. Some essential oils cost more than others. If you know the difference, you will know which oil is worthier than which other. If your buyer sells all the oils at the same price, understand that he is cheating and never buy from him.

5. Don’t buy from buyers who sell oils in containers other than dark-colored glass bottles. This is because most of the oils are photo-sensitive and need to be stored in dark bottles to avoid being transformed due to the effect of sunlight.

6. Don’t purchase oils from village fairs, craft bazaars, farmer’s fairs/festivals etc. Many people sell aromatherapy oils as a hobby. Such people may not give you proper details of oils and may also not sell quality essential oils.

7. Don’t close oils with or buy oils that have rubber glass dropper tops. Essential oils are very concentrated and can turn the rubber into gum spoiling the purity of essential oils.

8. Don’t buy oils in large quantities. Every essential oil has a storage period. Some oils may go rancid if they are stored for a long time. Avoid it by storing oils only for a limited period of time.

Infused wisdom: What are infused oils and how to make them?

By now, you should know that apart from pure essential oils, there are other oils like carrier oils, infused oils, resins and CO2s. Infused oils are as good as essential oils in their therapeutic properties as they are infused with the immune qualities of a herb. In general, an infused oil is a carrier oil “infused” with the wisdom of one or more herbs. Infused oils are more beneficial than carrier oils as they combine the holistic healing properties of both carrier oils and the herbs used.

What are infused oils? Why is there a necessity for infusing essential oils? Some of the plants do not have essential oils to protect them. Their immune mechanism is different and it is very difficult to extract essential oils from such plants. Infused oils bring out the healing qualities of such plants. By infusing such herbs into carrier oils, we infuse the health quotient of those herbs into the carrier oil of our choice. This is especially very useful for aromatherapy purposes as you can use even infuse popular oils with herbs to add to the therapeutic grade of the oils.


Properties of infused oils: Infused oils are no different from carrier oils or essential oils in properties. They are more therapeutic than base oils as they carry the strength of herbs in them. However, most of the infused oils are a bit oily and like carrier oils, can go rancid if not prepared or stored well. It is essential for you to read the safety information on carrier oils/herbs before preparing an infused oil recipe. This is because certain herbs may go rancid if used without caution. There are several ways to prepare infused oils. Two most popular ways are – 1. Preparation of Hot Infused Oils and 2. Preparation of Cold Infused Oils.

How to make Infused Oils: Making infused oils can be very useful and can be used in bath water, as body powder and in even food and other aromatherapy recipes. For instance, you can infuse basil into  Olive oil, Calendula into Sweet Almond oil etc. While the former will make a great salad dressing, the latter is a remarkable skin toner.
Hot Infused Oils: Hot Infused oils are prepared in low heat. To make a hot infused oil, you will need the following supplies – Double Boiler, Cheese cloth, 250 g of herbs, 3 cups of carrier oil  of your choice – Olive oil, Sunflower oil, Sweet Almond oil and Avocado oil. Place the herbs in double boiler and cover with oil. Let the mixture simmer for 3 hours. Stir well and see to it that the herbs are infused into the oils. Remove from heat after the herbs are fully infused and filter the whole blend through a cheese cloth. Then, pour the oil into bottle and store in a cool, dark place.

Cold Infused Oils: You require the same supplies for this, except for the stove. Dry the herbs completely and place them in a large jar. Add oil and keep the mixture in sunlight for about 2 to 6 weeks. The infusion process will take place in the presence of sun.

When it is thicker than water: 6 tips to work with thick aromatic oils

If blending essential oils involves a lot of quintessential things, working with thicker oils involves more than that. Not all oils are of water-like consistency. There are some which are thicker than water in viscosity and are very difficult to handle. A few are even solid at room temperature so much so that you need to first bring them to a workable consistency to use them. Some steam distilled oils like Patchouli, Sandalwood, CO2s, absolutes, balsams and resins are of a solid consistency which makes it difficult for aromatherapists to prepare the oils for working.

Working with thick aromatic oils: Many resins, including Benzoin, are often thicker and more solid in room temperature. You can bring such oils to a workable consistency if you know the trick of the trade. But this is easier said than done as you need to bring an oil to a workable consistency without losing any of its therapeutic properties and this is not easy. The general way to come of the “thickness” of essential oils is to heat them. But heating plainly seldom helps as oils can vaporize or lose their originality when heated.


Below are a few tips to work with thick aromatic oils:

1. Water bath technique: While heating on the stove plainly can be simple, heating using this technique can be different. This is because it retains the aroma, quality and properties of the oil intact without any adulteration or evaporation. To follow this technique, gently heat the bottle containing essential oil in a warm water. Do not place the bottle or pan containing bottle directly on the stove. Instead, pour warm water in a pan and keep the bottle in it for 10 minutes. Keep changing warm water as and when it is cooled. This method can keep the oil’s quality intact and at the same time, bring the consistency of the oil to a workable level. You can use this method to work with resins, balsams and thick CO2s. This technique can be used even to open bottles that are difficult to open. If your Patchouli or Olive oil bottle is difficult to open, place it upside down in warm water for 15 minutes. The bottle will open after the water bath treatment.

2. Heating with triple boiler: Though heating with double boiler helps, heating with triple boiler helps more. Place your small bottle of oil in tea cup with a some warm water. Place the tea cup on a large container of warm water and heat accordingly.

3. Measure by weight: When your oil is warm, it is difficult to weigh it drop by drop. Avoid doing so and measure by weight. You can use a digital scale that has a tare reading, to allow you to measure only the content of oil in a bottle.

4. Warm carrier oil too: What will happen if you pour a warm oil into a cold carrier oil? You will get blobs instead of therapeutic oils. To avoid this, warm your carrier or blending oil too.

5. Alcohol is better: Often, alcohol is better than carrier oil. Some oils do not dilute in carrier oils too. But all oils can be diluted with alcohol and this is the advantage of using alcohol with beeswax and cocoa.

6. Warm water tray technique: If you want to do things at one go, heat all the oils you want to heat/dilute or bring to a workable consistency by placing their bottles in a tray of warm water. This is especially useful if you are blending two oils and want both to be in the same warm conditions.

Everyday essentials: 4 aromatic recipes for generic use and perfumery

Aromatherapy can be applied for everyday use, on a regular basis. But you should know the basic safety measures, blending properties and useful recipes to apply essential oils to your life. Though essential oils are pure concentrated oils extracted from natural plant parts, they can be toxic too. For instance, some oils like Bergamot are photo sensitive and require cautious handling. Certain oils need to be used only as blends and not directly on the skin as they can cause skin allergies. Generic and basic use of essential oils involves use of them as bath water, perfume, air fresheners etc. This article will elaborate on a few basic essential oil blends  that maybe useful to you on a daily basis.

Essential oils for everyday use: The following recipes need to be tried only after you know in depth about essential oils and their different aroma properties. If you are a newbie to this whole aromatherapy business, better to take efforts to learn a little about essential oils and then, try out the recipes:


1. Carrier Oil Base Perfume: This is a perfumery blend made using carrier oils. To make this blend, you will need the following ingredients: 15 to 25 drops of your perfume blend, 1 tbsp of Jojoba carrier oil and other supplies for mixing. You can replace Jojoba with even oils like Sweet Almond or Apricot Kernel. Use oils based on the perfume you want to achieve in the end. Blend all oils together well and store in an airtight container which is made of dark-colored/amber glass. Once you know the mixture is blended properly, take a drop of it and apply on to your pulse points. Note how the scent changes from time to time. If you are allergic to oils or suffer from any skin problems, better to do a skin patch test before application.

2. Alcohol Base Perfume: A perfume made with alcohol as the base. To make the blend, you will need 4 ¼ teaspoons of Vodka, 1 ½ teaspoons of distilled water and 60 drops of your perfume blend. Blend all ingredients well and store in an airtight container. Ensure that you store in a cool, dark place that is does not initiate any reaction with the sunlight. Let the perfume blend sit for 2 weeks. Shake the bottle 1 to 3 times daily to ensure that you mix the oils well. After the stipulated period of time, filter the perfume blend. You can use a coffee filter to do this. Re-bottle the blend after filtering and let it sit for a few hours. Do a skin patch test before applying the perfume to your pulse points.

3. Body Splash: First, try making a Body Splash of one ounce quantity. To make the body splash, use 4 ½ tsp of Vodka, 2 tsp of distilled water and 18 drops of your perfume blend. You need to first prepare the perfume blend using pure essential oils to mix with Vodka and water. Once the mixing is over, store in a dark-colored bottle away from sunlight. Shake the bottle to mix the ingredients at least for 1 to 3 weeks. Do this for about two weeks. By the end of the second week, use  a coffee filter to filter the impurities in the oil and re-bottle the perfume. Read all safety data and skin patch test before trying out your body splash.

4. Air Fresheners: Air Fresheners are the best items for generic, home-environment use. To make an air freshener, mix 20 drops of Lime oil with 14 drops of Bergamot, 4 drops of Ylang Ylang and 2 drops of Rose.

Aromatic blending basics: 3 first steps you need to know

Aromatic or perfumery blending is often done for the fun of experimenting with various aromas and oils that yield those aromas. Traditional perfumers do years of study to master the art of perfumery, analyzing each and every aroma in its top, middle and base notes. Aromatic blending involves use of synthesized chemicals along with natural ingredients. In general, perfumers use aromas from chemicals that are extracted from natural plant parts and ones that are prepared in chemical ways using essential oils, absolutes, grain alcohol, carrier oils, herbs, water and CO2s. Edward Sagarin explains in detail about perfumery using aromatic blends in his book, ‘The Science and Art of Perfumery’

Aromatic blending of essential oils: Blending essential oils for aromatic purposes involves a lot of nuances. When a blend is created for aromatic purposes, therapeutic benefits can also occur. However, one has to focus on the aromatic end result of the blend than its therapeutic benefits. Below are the first steps with regard to blending basics:

1. Essential oils categories: Essential oils can be classified into broad categories based on their aromas. Called as aroma families, oils of the same family blend well together, while those of different families require good carrier oils to blend. Below are the basic aroma categories:


Floral oils: Lavender, Neroli and Jasmine oils produce a floral aroma.
Woodsy oils: Pine and Cedar oils produce a woody aroma that is strong and powerful.
Minty oils: Fresh, minty aromas are yielded by Peppermint and Spearmint oils.
Camphorous oils: Eucalyptus, Tea Tree, Cajuput oils yield Camphorous aromas that are medicinal too.
Spicy oils: Nutmey, Clove and Cinnamon yield aromas that are spicy and lively.
Oriental oils: Ginger and Patchouli yield oriental aromas of a unique kind.
Citrus oils: Orange, Lemon and Lime yield Citrus aromas that refresh the spirit.
Earthy oils: Oakmoss, Vetiver and Patchouli yield earthy aromas.
Herbaceous oils: Marjoram, Rosemary and Basil  yield herbaceous aromas that are medicinal too.

2. Oils that blend well: Before you start, you need to know the basics about essential oils. Not all oils blend together. However, you can vouch by the above categories. Oils of the same category generally blend well, while those of different categories too sometimes go well. Floral oils blend well with spicy, citrus and woodsy oils. Spicy and oriental oils go well with florals and citrus oils. Minty oils blend well with citrus, woodsy and earthy oils. The best part about Woodsy oils is, they blend well with almost all oils.

3. Harmonizing aromas: Oils are concentrated substances that evaporate quickly. They yield different kinds of scent during their evaporation and this variation in scents are called Notes. Essential oils that evaporate quickly (within 1 to 2 hours) are called top notes. Oils that evaporate with 2 to 4 hours are called middle notes, while those that take longer time to evaporate (the thicker oils) are called base notes. You need to take into account these evaporation notes while creating aromatic blends.

When you start off, work with oils in small amount – say, 5 or 10 drops. Also, work with essential oils, absolutes and CO2s before working with blends. You can use carrier oils, grain alcohol or other base oils after your work with pure essential oils is done.

Good blend equals creativity and knowledge: 5 therapeutic blending tips

One of the best things about aromatherapy is, you can create your own blends and experiment with several essential oils, absolutes, CO2s and carrier oils at a time. Blending of essential oils is done to enhance the effect of oils by bringing them together. A good blend of essential oils demands creativity and knowledge about aromatic blending, aroma profiles of oils and therapeutic effect of each and every oil. You can blend essentials for the sheer pleasure of mixing aromas and also for the delight of inventing your own therapy for your problems and ailments – acne, bladder infection, arthritic pain, fatigue, tension, stress, depression, muscle problems or other issues. By combining anti-viral oils you can make essential oil blends that are effective in treating injuries, cuts and scrapes on account of their antimicrobial properties.

Therapeutic blending tips: Therapeutic blending of essential oils is a bit different from aromatic blending. In an aromatic blend, you look only into the aroma of the blend. Only the end-aroma is important, not the therapeutic effect behind aroma. But in a therapeutic blend, both the healing and aromatic properties of  blend are important. In fact, both aroma and healing are so intertwined that just a whiff of the oil tunes you out of depression or anger or yields the desired effect.


There are several things you need to know before you start your own blending experiment. Below are a list of points to be noted:

1. Know aroma profiles: Essential oils have aroma profiles. That is, a particular oil maybe a top note, middle note or a base note. You need to know the notes of oils to understand them fully and use them appropriately. A delicate, highly volatile oil like Bergamot is a top note; a tenacious, less-volatile oil like Clary Sage is a middle note, while a deep and rich oil like Patchouli is of base note. While creating a good blend, you need to achieve balance between top, middle and base notes.

2. Test your oils’ aroma: To learn more about aromas of essential oils, you can test the aromas on a blotted paper or unscented tissue. Concentrate, inhale the notes of the oils and record the impressions you get of the aromas in the top, middle and base/dry-out stages. This would be useful in preparing blends because good blends have to carry a pleasant and likable aroma to work. Listen to yourself and note how you feel when you inhale a particular fragrance – energetic, relaxed, uplifting or sensual. If you like a particular aroma, find out which part of the oil you want to work with – top, middle or base –  and gather how you much of this aroma you want in your blend recipe.

3. Start with a small amount: Start making a small amount of the blend you want to make. Better to try with 5, 10 or 20 drops. Though large amount of essential oil blends do good, you can end up making a huge waste of time and money if the blend does not turn out to be therapeutic as expected.

4. Work with pure essential oils: Work with pure, therapeutic grade oils – essential oils, CO2s and absolutes. Do not complicate things by adding carrier or other oils in the beginning of the blend preparation. This would save a lot if you do not like the aroma of the blend you created.

5. Maintain a record: Keep a notebook on the number of oils you used, amount of oils used, which blends are of top notes, which are middle/base or which are to your liking etc. When you maintain a record, you will be able to repeat your favorite blends in large scale and store them for future. You will also avoid wasting time on blends that suck.